Language

Polishing tile edges requires a meticulous approach and attention to detail. It is a skill that can elevate the appearance of any tiling project, providing a refined and polished finish. But how can you achieve this level of perfection? In this discussion, we will explore the essential steps and techniques for polishing tile edges. From the necessary tools to the recommended process, we will guide you through the journey of creating a visually appealing and professional-looking tile installation. So, prepare to uncover the secrets of achieving that flawless finish and discover the artistry behind tile edge polishing.

What are the essential tools required for granite and marble edge polishing? When it comes to polishing the edges of granite and marble, having the right tools is crucial. Polishing techniques for curved marble edges, best practices for polishing granite tile edges, common mistakes to avoid when polishing marble edges, choosing the right grit size for marble edge polishing, and tips for achieving a high gloss finish on granite edge polishing are all important factors to consider.
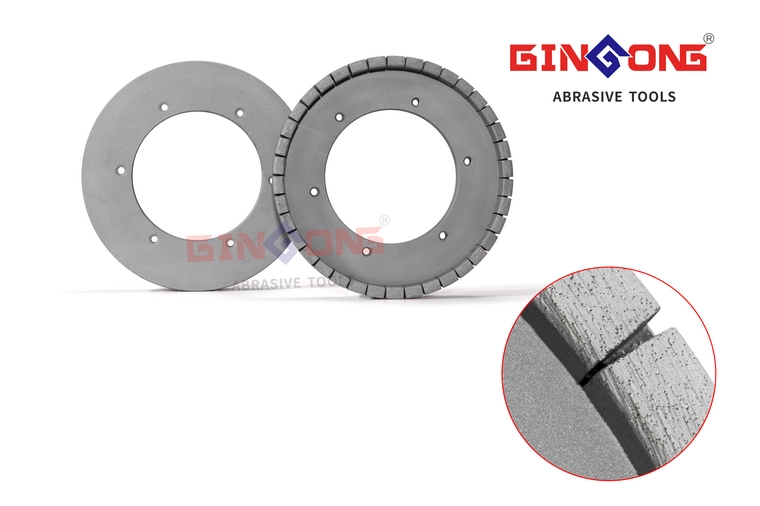
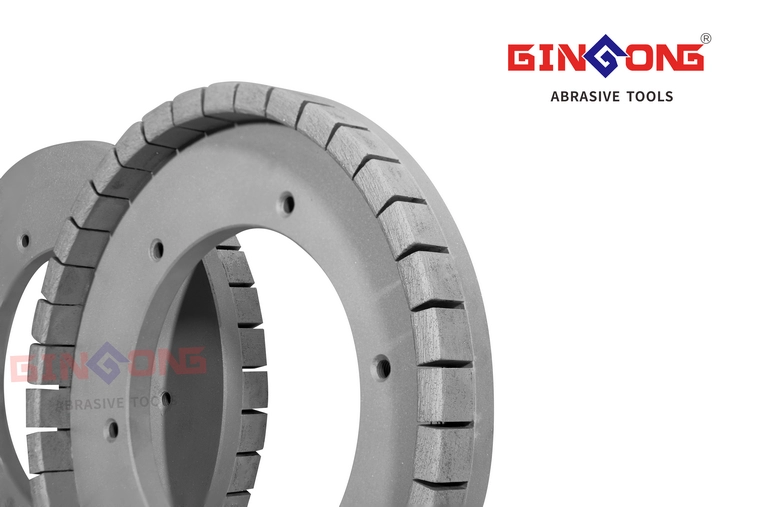
To begin, the tools needed for granite and marble edge polishing include dry diamond polishing pads, a low speed or variable speed grinder polisher, a Velcro backing pad holder or hook and loop backing pads holder, and a clamp and a piece of wood. These tools are essential for achieving a professional finish on granite and marble edges.
When it comes to polishing techniques for curved marble edges, it is important to use smaller grit sizes such as 50, 100, and 200 to remove heavy scratches before moving on to higher grits. Using a low speed or variable speed grinder polisher allows for more control and precision when polishing curved edges.
Best practices for polishing granite tile edges include clamping the tile securely in place using a clamp and piece of wood, and starting the polishing process with a 50 grit polishing pad. Gradually increasing the grit size will help achieve a smooth and polished finish.
When polishing marble edges, it is important to choose the right grit size for the desired finish. Grits 800, 1500, and 3000 can be used to achieve a high gloss finish on marble edges. It is also important to avoid common mistakes such as using too high of a grit size too soon or applying too much pressure during the polishing process.
When engaging in granite and marble edge polishing, it is essential to prioritize safety by following these important tips. Safety precautions must be taken to protect yourself from potential hazards. Always wear safety glasses to shield your eyes from flying debris. Use a mask to avoid inhaling dust particles and protect your respiratory system. Hand gloves are necessary to prevent injuries and provide a better grip on the tools. Additionally, use a hearing protection ear plug or similar when polishing to safeguard your hearing.
Common mistakes to avoid include neglecting to wear safety gear, which can lead to accidents and injuries. Another mistake is rushing the polishing process, which may result in uneven or unsatisfactory results. It is important to follow proper polishing techniques to achieve the desired finish.
Recommended equipment for granite and marble edge polishing includes dry diamond polishing pads, a low speed or variable speed grinder polisher, and a Velcro backing pad holder or hook and loop backing pad holder. Use clamps and a piece of wood to securely hold the marble or granite slab tiles in place during the polishing process.
Lastly, maintenance tips for granite and marble edge polishing involve regular cleaning and sealing of the edges to preserve their shine and prevent damage. By following these safety tips and utilizing the recommended equipment, you can ensure a safe and successful granite and marble edge polishing experience.
To polish granite and marble edges, gather the necessary tools such as dry diamond polishing pads, a low speed or variable speed grinder polisher, a Velcro backing pad holder or hook and loop backing pad holder, as well as clamps and a piece of wood for stability. Here are the steps to polish granite and marble edges:
To achieve a high gloss finish on marble tile countertop edges, it is essential to use wet polishing marble diamond polishing pads. Wet polishing pads are specifically designed to work with water, which helps to cool the pads and prevent overheating during the polishing process.
When polishing marble tile countertop edges, it is important to be aware of alternative edge polishing methods. These may include using different types of polishing pads or techniques, such as dry polishing or using different grit sizes. However, wet polishing with marble diamond polishing pads is generally considered the most effective method for achieving a professional and glossy finish.
There are different types of marble finishes, including honed, polished, and brushed finishes. Each finish requires specific maintenance to preserve its appearance and prevent damage. For polished marble countertops, it is important to clean spills immediately, avoid using abrasive cleaners, and regularly apply a marble sealer to protect the surface.
When polishing marble edges, there are common mistakes to avoid. These include applying too much pressure, using incorrect grit sizes, and not properly cleaning the surface between grit changes. It is important to follow best practices for sealing marble tile edges to ensure long-lasting results. This includes thoroughly cleaning the surface, applying the sealer evenly, and allowing sufficient drying time.

To effectively polish marble tile countertop edges, a range of tools is essential. Here is a list of the tools needed for polishing marble tile countertop edges:
When selecting tools for marble polishing, it is important to choose high-quality materials that are specifically designed for the task. Using the wrong tools can result in damage to the marble or an unsatisfactory finish.
To achieve a high gloss finish, it is crucial to follow proper polishing techniques. Common mistakes to avoid include using too much pressure, skipping grits, and not cleaning the surface between grits. Additionally, regular maintenance is key to preserving the polished surface. Clean the countertop regularly using a mild soap and warm water, and reapply the marble sealer as needed.
Step 1: Clamp the Marble Slab on Work Table
To ensure stability and prevent any movement during the grinding or polishing process, securely clamp the marble slab onto a sturdy work table. This step is crucial in achieving a professional and flawless finish on your marble tile countertop edges.
When clamping the marble slab, it is important to consider alternative methods that can provide a secure hold without causing any damage. One option is to use specialized clamps designed specifically for marble slabs. These clamps are adjustable and can be tightened to securely hold the slab in place. Another alternative is to use suction cups, which can be attached to the surface of the marble and then attached to the work table. This method is particularly useful for smaller or lighter marble slabs.
While clamping, it is essential to take precautions to prevent damage to the marble slab. Using masking tape on porous marble is highly recommended. The tape creates a protective barrier that prevents any potential staining or discoloration during the polishing process.
It is important to choose the right work table for marble slab polishing. The table should be sturdy and level, providing a solid foundation for the clamped marble slab. A table with adjustable height options can be advantageous, as it allows for easy access to all areas of the slab.
Lastly, it is crucial to avoid common mistakes when clamping marble slabs. One common mistake is over-tightening the clamps, which can lead to cracking or damage to the marble. It is important to find the right balance between a secure hold and gentle pressure. Additionally, not using enough pressure when clamping can result in movement and instability during the polishing process.
Taking the time to properly clamp the marble slab onto the work table will ensure a stable and controlled environment for successful polishing.
Step 2: Prepare for Marble Polishing With Polishing Pads
After securely clamping the marble slab onto a sturdy work table, the next step in preparing for marble polishing is to address any sharp and heavy scratches on the edges using polishing pads of smaller grit sizes. Choosing the right pads is crucial to achieve the desired results. For removing heavy scratches, start with a 50-grit pad and gradually move to 100 and 200-grit pads. These pads will effectively smooth out the rough edges and prepare them for the polishing process.
Proper polishing technique is essential to ensure a consistent and even finish. It is important to maintain a consistent pressure while moving the polishing pads along the edges. This will help in achieving a uniform shine across the entire surface.
If there are stubborn stains that do not come off with the initial polishing, additional steps may be necessary. In such cases, it is recommended to use a higher grit pad, such as a 1500 or 3000-grit pad, to further refine the surface and remove any remaining imperfections.
When polishing corners and hard to reach areas, it is important to be extra careful and pay attention to detail. Use smaller polishing pads or hand polishing tools to effectively reach these areas and ensure a consistent finish throughout the entire countertop.
Step 3: Attach Polishing Pads & Backing Pads to Wet Polisher , Start Polishing
Once the backing pads have been securely attached to the wet polisher, the next step is to begin the marble polishing process. Before starting, it is crucial to choose the right polishing pads for achieving the desired finish. The diamond marble polishing kit typically includes different grits of polishing pads, starting from 50 grits for initial polishing. Attach the 50 grit polishing pad to the velcro of the backing pad, ensuring a secure fit.
Maintaining the wet polisher is essential for optimal performance. Regularly check the water flow to ensure a constant supply of water during the polishing process. Adequate water flow is crucial as it helps to cool down the surface and prevent overheating. Additionally, it helps to flush away the debris and keep the surface clean.
One common mistake to avoid when polishing marble is excessive grinding. It is important to remember not to polish the marble edge for more than four or five times, especially with lower grits. Over-polishing can lead to unnecessary grinding, which may not contribute to the desired finish.
To achieve a high gloss finish on marble edges, start the polisher at a low RPM and use a side-to-side motion. Gradually increase the speed as you progress to higher grits for a smoother finish. Continue the polishing process with higher grits until the desired shine is achieved.
Step 4: Review Polishing Finish Before Moving to Next Grit
Continuing the marble polishing process, it is important to review the finish before moving on to the next grit. This step allows you to assess the current state of the marble and make any necessary adjustments before proceeding.
When reviewing the polishing finish, it is crucial to pay attention to several key factors. Firstly, consider the overall smoothness of the surface. The goal is to achieve a smooth and even finish, free from any saw marks, old sealant, or wax. Take your time to carefully inspect the countertop edges and ensure that they meet your desired level of smoothness.
Additionally, it is important to evaluate the level of shine or glossiness that has been achieved. Polishing techniques for granite countertops can vary, but for marble, it is important to choose the right polishing pads. The right pads will help you achieve a high gloss finish on marble countertops. Carefully consider the type of material the pads are made of and their intended use.
During the review process, it is also helpful to keep in mind common mistakes to avoid when polishing marble edges. These may include using too much pressure, not using enough water, or not following the recommended polishing sequence. By being aware of these mistakes, you can ensure that your polishing process is effective and efficient.
Lastly, comparing different polishing methods for natural stone surfaces can provide valuable insights. By exploring various techniques, you can determine which method works best for your specific marble countertop and achieve the desired finish.
Step 5: Move to Next Higher Grit for Marble Polishing
To achieve optimal shine and a smooth finish on your marble countertop edges, it is essential to move to the next higher grit in the polishing process. Using a higher grit for marble polishing is crucial as it helps to refine the surface and remove any remaining imperfections. One important technique for polishing edges is to ensure that every single part of the surface is polished with the current grit before moving on. Even a small unpolished area with a lower grit can result in a suboptimal shine.
To maintain consistency in the polishing process, it is recommended to perform wet polishing. This involves wiping the edge surface with a gently squeezed wet cleaning towel and then polishing it dry. The heat generated during the process will evaporate the water where the surface is already polished, ensuring that the entire surface is thoroughly dried. Once the entire surface is polished and dried, perform one more round of wet polishing before moving to the next higher grit.
Step 6: Polish Marble Till Grit 3000 Diamond Polishing Pads
Moving on to the next step in the marble polishing process, it is crucial to continue polishing the marble countertop edges with increasingly higher grits, eventually reaching the 3000 grit diamond polishing pads. Using diamond polishing pads has several benefits when it comes to achieving a high gloss finish on marble countertops. These pads are specifically designed to provide a smooth and shiny surface by removing scratches and imperfections from the marble. They are also highly durable and long-lasting, ensuring that you can achieve a polished look that will last for years to come.
However, it is important to be aware of common mistakes that can occur when polishing marble. One such mistake is using too much pressure when using the diamond polishing pads. Applying excessive pressure can actually damage the marble surface and create uneven results. It is also important to avoid using the wrong type of polishing pads for marble. Different types of pads are specifically designed for different levels of grit, so using the wrong pad can result in a less than satisfactory finish.
To achieve a high gloss finish on marble countertops, it is essential to follow a few tips. Firstly, it is important to start with lower grits and gradually work your way up to the higher grits, such as the 3000 grit diamond polishing pads. This allows for a gradual and smooth transition, resulting in a polished and glossy surface. Additionally, maintaining regularity in using the polishing pads is crucial to ensuring consistent results.
Once the marble has been polished to the desired finish, it is important to properly clean and maintain the polished surface. This involves using a mild cleaning solution specifically designed for marble, as harsh chemicals can damage the surface. Regularly wiping the surface with a soft cloth and avoiding abrasive cleaners or scrub brushes is also recommended to maintain the polished look.
Step 7: Follow All Step Correctly, Here Is Your Polished Marble
To achieve a perfectly polished marble countertop, it is crucial to meticulously follow all of the preceding steps, ensuring that each step is executed correctly and thoroughly. However, even with careful execution, there are some common mistakes that can occur during the marble countertop polishing process.
One common mistake is using the wrong polishing pads for marble. It is important to use pads specifically designed for marble to prevent damage and achieve optimal results.
Another mistake is not properly cleaning and maintaining the polished marble countertop. Regular cleaning with a mild soap and water solution is essential to remove any dirt or debris that can dull the shine of the marble. Additionally, it is important to avoid using abrasive cleaners or acidic substances that can etch the surface of the marble.
To achieve a mirror-like finish on marble, it is recommended to progress from a grit of 800 to 1500 and finally to 3000 diamond polishing pads. This gradual progression will result in a smooth and reflective surface.
In the event of scratches or imperfections on the polished marble edges, there are techniques that can be used to fix them. One technique is to use a fine-grit sandpaper or a rubbing compound specifically designed for marble. Gently rubbing the affected area in a circular motion can help to blend the imperfections and restore the smoothness of the marble.
Marble polishing pads can be used for both granite and marble edges. However, it is important to choose the right polishing pads for each material. Follow proper polishing techniques and avoid common mistakes to achieve a high gloss finish. Regular cleaning and maintenance will ensure the longevity of polished marble and granite edges.
Wet polishing involves using water as a lubricant to cool the surface and remove debris, resulting in a smoother finish for marble tile countertop edges. Dry polishing, on the other hand, requires no water and is generally faster but may produce more dust.
Necessary safety equipment for polishing marble tile countertop edges includes safety glasses, a mask, and gloves. Proper handling of polishing tools involves clamping the countertop and using a wet polisher. Prepare the surface by inspecting and smoothing it. Choose the right polishing compound and finish with maintenance tips.
Yes, the same set of diamond polishing pads can be used for both granite and marble edge polishing. However, it is important to choose the right polishing pads and techniques to achieve a glossy finish and avoid common mistakes. Proper maintenance is also key to maintaining polished tile edges.
The recommended speed for the grinder polisher when polishing granite and marble edges depends on the specific tool and material being used. It is important to refer to the manufacturer's guidelines for optimal results.
In conclusion, mastering the art of polishing tile edges is crucial for achieving a professional and polished look in any tiling project. By following the step-by-step guide and using the recommended tools and techniques, you can enhance the overall appearance of your tile installation. So, dive into the world of tile polishing and unlock the secrets to achieving that perfect finish.